Aug 12, 2013

Butternut Squash and Carrot Soup

While i was on my soup frenzy, i made this one of the days. And i loved it. it is nice creamy with a hint of sweetness.. And to confide in you, this is the first time i used fresh sage. I always wondered what i can use them for whenever i saw them on super-market shelves. They have a distinct strong flavour but only till it is raw. When cooked, it blended perfectly in the flavour of soup.

All you soup lovers are going to like this, go try.

Butternut - Carrot Soup
Let's collect Ingredients:

1 tbsp Olive oil
1 white onion, diced
3 cloves garlic
2 carrots, sliced
1 stalk celery ( i didn't have celery at home so didn't use it)
3 cups veg broth
1 butternut squash, peeled and chopped
2 tbsp chopped fresh sage
1/2 cup soy milk
salt and pepper to taste

Let's start preparing soup:

Butternut-Carrot Soup in making from left to right.
1. In a large soup pot saute garlic and  onion in oilve oil until onions turn soft. (2-4 mins)

2. Add carrots and celery. Cook for another 3-5 mins.

3. Add butternut squash and stir just to coat.. Add vegetable broth and sage. For the broth,I used 1 Maggi Bouillonkuipje Groente and 1 tbsp Maggi tuinkruiden bouillon.

4. Bring to boil, then reduce heat to a slow simmer. Allow to cook until squash is soft.

5. Puree the soup in blender. If you prefer chunky texture then mash using potato masher or large fork. Mash until smooth.

6. Stir in soy milk.
Season with salt and pepper to taste.

Enjoy !! :)


Jul 15, 2013

Methi Mutter Malai

Interestingly while we lived in India, we never ever once ordered this tasty vegetable when we ate at restaurants. Always were too focused on Paneer (cottage cheese) and some nice tandoori things. 

I tried this recipe for the first time after moving to Netherlands, honestly it was just to have something different in the meal and didn't have any high expectations.
But once we had it, it became one of out absolute favorite... any thing that dear hubby loves goes on my frequent cooking list (newly married or looking for ways to win your husband, note this down as one of the tips, win his tummy and you should be good ;-) )


Now that this summer i also sow some fenugreek in my small veggie corner, got plenty of good fresh fenugreek leave on hand... so already made this one a few times. 
And why not, this one is absolute yumm with added benefits of fenugreek. And goes well with roti, naan, rice anything. And easy to make ! win win. 

So shall we start?

Let's collect ingredients:

2 cups chopped fenugreek (methi) leaves
1 Onion, chopped
2 Tomatoes
3/4 cup Boiled Green peas
1/2 tsp cumin seeds
3/4 cup milk
1/2 tbsp Sugar
2-3 tbsp Oil
Salt to taste

Dry Powdered Spices: 
For the spices either you can roast and powder below listed items or alternatively just used "garam masala" powder.
2 small sticks cinnamon
3 cloves ( lavang)
2 cardamoms (elaichi)
3 black peppercorns (kalimirch)
1 tsp cumin seeds

To be ground into a paste:
1 Onion
3-4 Green Chillies
1"Ginger
2-3 tbsp Cashew nuts
2 tsp Poppy seeds (khus khus)
Methi Mutter Malai
Let's start preparing MMM aka Mutter Methi Malai :-)

1. Wash the fenugreek leaves. Add 1/2 tsp of salt. leave it aside for 15 mins and then squeeze our the water.

2. Boil the tomatoes in water for about 10 mins, let it cool slightly and blend into puree.

3. Heat 1-2 tbsp oil, add cumin seeds. Let it crackle. Add fenugreek leaves, cook for a few mins (3-4 mins). Remove it from pan.

4. Add balance 1-2 tbsp oil, let it heat again. Add onions and fry till golden. 

5. Add grounded paste and fry for a min. Add tomato puree and dry masala to it.  Simmer for a 3-4 mins and then add green peas, fenugreek that we had kept aside after sauting, milk, sugar, salt and little water to bring it at preferred consistency. 

6. Cook for a few mins and serve hot !

Tada !
That's it.
Enjoy :-)

Jul 9, 2013

Carrot Apple Ginger Soup

If you feel, i have turned into a soup fan, you won't be wrong. I have turned into not only soup fan but also a salad fan. I have tried so many variations of soup and salad that it even surprises me. As a child that was the one thing i didn't see myself doing when i turn thirty. 
So you see, life is indeed expecting unexpected. 


This soup over here is nice blend of fruity and veggie flavours. It has carrot,  an-apple-a-day-keeps-doctor-away thingy and nice gingerly bit. You can even add some orange juice to it, how more fruity can you be? 
Ok, don't take my word for it, try it out yourself, will you? 
Then here we go....

Let's collect ingredients:

3 tablespoons olive oil
1 small yellow onion, sliced
1-2 clove garlic, minced
2 tablespoons fresh ginger, peeled and grated
1 small apple, peeled and sliced
4 to 5 cups sliced, peeled carrots (about 1 1/2 pounds)
4 cups vegetable broth
1/2 cup Orange Juice (optional)
pinch of nutmeg
salt and pepper to taste

Let's start putting Soup together: 

1. Heat olive oil in a large pot over medium heat.  Add onions and cook until it's softand translucent. (about 5 mins.)
2. Add ginger and garlic and cook for one minute, until fragrant.  
3. Add apples, carrots and cook for 3 minutes more.
4. Turn flame to medium-high and add vegetable broth.  Bring to a boil.  
5. Reduce flame to low and simmer, uncovered,  until carrots and apples are softened, about 30 minutes.  
6. Remove pan from the flame and let it cool down a bit. ( About 10-15 minutes.)
7. Blend the soup.
8. Return soup to the pot.  If you prefer soup thinner in consistency, add more vegetable broth or Orange juice if you’d like.  
9. Add a dash of fresh ground nutmeg, salt and pepper to taste.  
Note: Please mind that Soup got some ginger so it is already a bit spicy so watch out on amount of pepper. 


Enjoy delicious, spicy and nutritious soup ! 
Bon Appetite.
Eet Smaaklijk.

Safety Note: If you are blending in blender be sure not to fill the blender more than halfway full or hot soup will explode everywhere. Let some of the steam escape to avoid unpleasant incidents.

Jun 16, 2013

Potato Pumpkin Gratin

Sometimes we all pass through those phases when we try something and love it then we  can't help going on and on with similar new things.
For me it was pumpkin and baked dishes. I was obsessed with pumpkin after trying this amazing pumpkin soup that i blogged about. And then kept looking for what else can i do with it. I ended up coming through some recipes but most of them using sweet potato. But i decided i am just going to make it the way i find okey. To be true it was more like with whatever i had in pantry.  

Dear hubby is a big fan of baked dishes and so i am always in search of something nice and inspiring to bake. This is what i ended up baking one day and total thumbs up. 
The best things about it is it is really easy and simple to prepare and doesn't even require you to go grocery for the lots of ingredients. 

It is basically simple layers of slices of potatoes, of pumpkin with cheese spread in between. Aah and not to forget creamy sauce on the top. 

Potato Pumpkin Gratin
Let's collect the ingredients : 

1/2 peeled pumpkin, sliced thinly
3-4  peeled potatoes, sliced thinly
black pepper or cayne pepper if you like it,
1 1/2 cups shredded Gruyère cheese or any other cheese of your preference.
salt to taste

For the sauce:

1 1/2 cups heavy cream
2 large cloves of garlic, minced or cut finely.
1 1/2 teaspoons fresh thyme leaves

Let's start assembling and baking:

1. Preheat oven to 200°C (400°F)
2. Meanwhile, In a small saucepan add the cream, garlic and thyme and heat for sometime to absorb garlic flavour into the cream.

Steps - Potato Pumpkin Gratin in progress.
3. Butter a baking dish. 
4. Place a layer of thinly sliced potatoes on the bottom of baking dish.
5. Add salt, pepper and a small amount of cheese on top.
7. Place a layer of pumpkin on top of that potato layer. 
8. Add salt, pepper and a small amount of cheese on top.
9. Repeat the steps one more time with potato - pumpkin layers. 
10. Pour the creamy sauce over the potatoes and cheese.
11. Add final layer of cheese. Cover with foil and bake for 40 minutes.
12. Uncover and cook about another 30 minutes until done.

Potato Pumpkin Gratin, ready to savor. 
Your Potato Pumpkin Gratin is ready to savor. Enjoy ! :-)

Apr 29, 2013

Veg Pasta in Creamy Spinach Sauce


We eat lots of pasta, almost every week, sometimes twice a week. Mainly because of the ease of cooking and because DH loves it. But he doesn't love all of them, so for example he is not a big fan of tomato based sauce in pasta so while i love pasta arrabiata for it's adjustable spiciness, but he will not mind give it a miss. 

This time i decided to use this spinach from the fridge and try pasta with spinach. I searched recipe on internet and most of them were with all fancy kind of cheese to be included for creamy spinach sauce, and neither i had all those fancy cheese in fridge nor intended to go do grocery.
So i came up with a solution, how about just make some white sauce and can add to pasta along with spinach paste ! Excellent. So that is what i did.

By this time Ashu was already done with his easy pasta, complaining it wasn't the same as i make and also there was no parsley in home !

When i was done with this  i asked him...
You can try this one, there is plenty. 
No, i had enough...actually had a lot.
Ok may be just taste it.
umm, hmmm ok. But just a little, only to taste. 
ya ya, you can take more if you like it.
After first bite. 
hmmm ya may be i can take a bit more. Ok let me just eat it.
haha, success !

So you see, it was THAT nice.

Here we go, this is what i did in my kitchen. 

Creamy Spinach Pasta
Let's collect the ingredients:


For white Sauce:

1-2 tbsp butter
1 1/2 cup milk
1 tbsp all purpose flour
2 tbsp cheese
salt to taste

For Spinach Paste:

handful of spinach (Around 1 bowl)
3-4 garlic clove
1 tsp freshly ground black papper
1 tsp freshly ground sea salt
1 tbsp lime juice
1 tbsp cheese (optional)

For Pasta:

3 cups Pasta, cooked
1 tbsp olive oil
2 tbsp garlic cut in small pieces or minced whichever way you prefer in your pasta 
1 tbsp cut red chilli
1/2 cup cut capsicum, i had a mix of green, yellow, red (optional)
Few olives, because i love them. (optional)
A few baby spinach leaves for seasoning

Let's start making Pasta:

For the white sauce :
1. Melt the butter in a saucepan. 
2. Stir in the flour and cook for 1-2 minutes 
3. Take the pan off the heat and gradually stir in the milk to get a smooth sauce. Return to the heat and, stirring all the time, bring to the boil. 
4. Add Cheese and simmer gently until cheese has melted and sauce has thickened to your preferred consistency. Season with salt.

For Spinach Paste:
1. Mix everything together and blend them.

For assembling pasta:
1. Heat olive oil in a pan. Add Garlic and red chilli. Saute them for a minute.
2. Add capsicum and olives. This step is really optional, i added them as i had them in fridge and wanted to use them !
3. Add spinach paste and white sauce and mix well.
4. Add pasta and mix well till it's all evenly covered.
5. Season with some fresh spinach leaves. 

Your delicious creamy spinach sauce veg pasta are ready ! Enjoy !!


Apr 9, 2013

Pumpkin Soup

I was on a healthy eating bandwagon last month. Please note verb "was" here. I haven't been much into pumpkins and it hardly enters my kitchen but once i tasted how amazing this soup tasted i already have had it a few more times. 

While it is nice to go healthy, it doesn't always mean you have to eat bland food and your taste buds have to suffer. I tried so many tasty recipes for the first time that i have a lot of new additions in my favorite list ! 
I know i need to share more recipes but it just gets too busy specially with Lil Bun in our lives. By the way he loves this soup as well, i was having it the next afternoon in lunch and he was making faces as if why not to me? So i gave him a spoon and he licked it thoroughly, so inspired i gave him some more and he gulp it happily. So then we ended up sharing a lunch, i am so happy that soon we will be able to eat same meals and no more special baby foods but wait, still some time for that. No day dreaming, back to recipe.

Ok so what are we waiting for, let's get started.

Pumpkin Soup

Let's collect ingredients :

1 tablespoon butter
1 medium onion, finely chopped
2 cloves garlic, crushed
1 bowl pumpkin, peeled, seeded, cut into cubes (i used around half of pumpkin)
3 cups vegetable stock
1 tbsp tomato paste
1 tbsp grated parmesan cheese (optional )
¼ tsp salt 
¼ tsp pepper


Let's make some Soup :

1. Melt butter in a large saucepan over medium heat. 

2. Add onions and garlic and cook until translucent, while stirring in between not to make it stuck. It will take about 3-4 mins. 

3. Add pumpkin and cook until lightly softened. 

4. Add vegetable stock and tomato paste and stir to mix. 

4. Bring it to a boil over high heat, lower to a simmer, and cover. Cook for about 20-25 minutes, until pumpkin is very tender. 

5. Let it cool down a little bit and blend it into until smooth. 

6. Put it back on flame, add cheese, salt, and pepper; mix and serve warm.

Enjoy delicious healthy pumpkin soup !

Mar 13, 2013

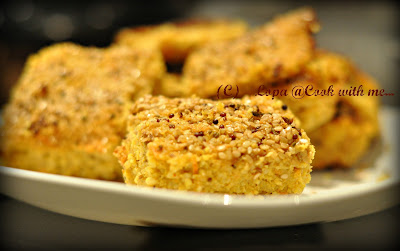
"Handvo" - a savory protein rich lentil cake.

Handvo
"Handvo", this is a typical "Gujarati" (west-India) cuisine. It is fast and easy. Well it is if you live in that part of India.
Living in Europe has its own perks and being able to make this item easy and fast might not be one of them.

In India we get ready-made flour for this and then it is just a matter of preparing the batter, letting it fremanate over night and adding spices before cooking it.

When we moved here, i didn't see flour in Indian stores and that is when and how i learnt to make it from scratch. However i can see this flour now in some of the Indian stores, mainly those which are a big bigger and keep many products imported from UK. On the side note whenever i visit England, it is like being back to home. Considering big Gujarati population in England, there is hardly anything you cannot find in there....so no missing food there, but still missing family and friends!

Anyway that is not what we were talking about! So here goes my recipe for "Handvo" from a scratch. 

I normally prepare a lot and have the same in breakfast next morning. Somehow i love when it more next morning when it is cold and all flavours are absorbed but that is just me!

My sister visited us this weekend and when asked if she wanted to have something specific this is what she could think of, so thanks to her i managed to take some more pictures of cooking process to post here ! ;-) Yes, that college from different stages of cooking preparation is the one i managed then, the second time.

Let's collect ingredients:

2 cup Rice
1 cup Tuvar Dal
1/4 cup Urad Dal
1/4 cup Green Mung Dal (Split Mung)
1/4 cup Split Bengal Gram (Chana Dal)
1 cup Sour Curd/Yogurt
1 Bottle gourd (Lauki), grated
1 tbsp Lemon Juice
1 tsp Soda-bi-carb
2 tbsp Sugar
1 tsp Chili Powder
1/2 tsp turmeric powder
3 tbsp Green Chili - Ginger Paste
3 tbsp Oil
Salt to taste

For tempering:

4 tbsp Oil
1/2 tsp Asafoetida (hing) - optional
2 tsp Mustard seeds (rai)
2 tsp Carom seeds (ajwain)
2-3 tsp Sesame seeds (til) - i put more as we love crispy sesame cover.
1" Cinnamon stick
3-4 Cloves (Laung / lavang)

Let's start making Handvo:

1. Wash and soak the rice and all dals together for overnight. I do it overnight because it is easier for me just to put it together before going to bed but 4-5 hours are enough.

2. Drain them and grind to paste.

3. Add Sour curd / yogurt and allow fermenting overnight. 

Here in Europe sometimes it is not warm enough for it to ferment well, so i warm oven switch it off and then leave it overnight in oven. I like a bit sour taste in Handvo so sometimes i let it ferment more.

4. When you are ready to cook, add rest of the ingredients to batter. (Grated bottle gourd, lemon juice, soda-bi-carb, sugar, chili powder, turmeric powder, green chili-ginger paste, oil, salt) 

Now you can either put this on gas in special handvo cooker, or in a non-stick pan which can be covered or can bake it in oven.

5. Pour this batter in a greased tin or baking dish.

6. Four the tempering, heat the oil and add the mustard seeds and fry until they crackle. Add the sesame seeds, ajwain and asafoetida and continue to fry. When the sesame seeds are golden in colour, pour this over the batter.

7. Bake in a preheated oven at 200 degree C (400 degree F) for 30 to 35 minutes till the crust is golden brown. 
  
Step from left to right 1. batter making, 2. fermanating, 3. in non-stick pan, 4. seasoning, 5. turning-over and ready to eat !
Most of the time I end up cooking half of the batter in a nonstick pan because of our love for crispy base. 
For that just pour batter in pan (not too thick, not too thin ) and cover on medium flame for 30-45 mins depending on how you prefer it, i also cook for a while turning it up-side down and i have over-all crispy cover which hubby dear loves. That is not possible in Oven. 

Handvo in a non-stick pan after turning-over.
I still end up doing a part in oven because i like the softness of baked handvo, and somehow it just looks and feels healthier to me! Ya i know, now that's something, you must be thinking considering so many different pulses in one item, how much healthier can you go! But that is me and my absurd ideas!

Handvo, baked in an oven.
So your Handvo is ready. You can eat it the way you like it.... with yogurt, ketch up, chutney.... or just on its own! 


Enjoy!


Handvo (Baked version)
Use the spices sparingly and it is a nutritious dish that kids can enjoy, my lil Bun had a few bites of it and he seemed to like it ! ( considering your kid is not allergic to all those lentils)  

Mar 7, 2013

Broccoli Almond Soup


Broccoli isn't very frequent at our home, but it started making more appearances after arrival of our Lil Bun. He eats it happily ( touch-wood and prayers for it to stay the same). 
Hubby dear isn't much a fan of broccoli so i was surprised when i saw him devouring on Broccoli Almond soup during our recent visit to India. 

After all the fat accumulation on the waist at the end of the trip, it was a high time for us to go a bit healthy. So while trying to include more salads and soups in our meals i have been looking for and trying new alternatives. And one fine day looking at Broccoli in the fridge, it clicked me why not to try this soup. It is simple, easy and nutritious. And what's more to it is Lil Bun and his dad both liked and devoured it. Success. 


It also got almonds, which we love. They are not only protein filled but also considered good for brain. I ate lots of almonds while i was pregnant and so whenever lil Bun does anything smart leaving us all surprised, we go something like "There goes all the almonds i ate!" hehe 
We use the roasted ones in the recipe to bring out complete flavour. 

I followed recipe from Tarla Dalal with a little bit of twist to accommodate our taste preferences.

So here we go. 

Let's collect Ingredients:

2 cups chopped broccoli (incl. stalks and florets)
1/2 cup chopped Onions
1 tsp chopped garlic
1 tsp chopped celery
1/2 tsp garlic salt (optional)
1/2 tsp cornflour dissolved in 1/2 cup milk
1 tsp ground black pepper
1 tbsp almond paste ( i left almonds in warm water for a few mins till it was a bit soft and then crushed it in blender)
1 tbsp roasted almond slivers
Salt to taste

For Garnish:
Few Cilantro leaves or a few almond slivers. 

Let's start making some soup: 

1. Heat 2 cups water in a deep pan, Add Broccoli stalks to it and cook on a medium flame for 5 mins.

2. Add Broccoli florets, onions, Garlic, Celery and salt (a bit less than final quantity if like us you like a bit garlicky taste and are going to include garlic salt). Mix well and cook for 3-4 mins, while stirring continuously.

3. Remove it from the flame and allow it to cool a little. 

4. Blend it with a hand blender till smooth.

5. Add the cornflour-milk mixture, garlic salt (optional), almond paste. Cook on a medium flame for 2-3 mins, while stirring continuously.

6. Add ground pepper, roasted almond slivers. Mix well and cook on a medium flame for another minute. 

7. Serve hot, garnished with almond slivers.

Enjoy!


Feb 22, 2013

Quick and Easy Pasta

Pasta is kind of staple food in our house. When we can't think of anything to cook, we make pasta.
I basically love different pasta sauce but DH is not that eager on them. His favourite has been pesto pasta. So at times i make half with pesto and half with arrabbiata sauce.

Recently we tried pasta without any sauce at a pasta joint, not that it was for the first time but this one sure did taste a bit different and more to our liking. So i took a detailed look at ingredients list.
First time i tried to make it at home, it still tasted a bit different. Yesterday i gave it a try again, adamant to copy that taste we had, and success!


You can take whole wheat brown pasta and can do it even healthier !

Here is a recipe. Quick and Easy.

Let's collect Ingredients:

2 cup - Pasta, boiled with a little olive oil and salt
1 small bunch Parsley - cut finely
5-6 Small Red Chilies, cut. (Or as many depending on heat that you can bear)
5-6 cloves Garlic - cut. (We like our pasta extra garlicky)
Black Pepper to taste
Salt to taste
2-3 tsp olive oil
1 tsp - garlic oil - optional
3 tsp Pine nuts - optional
Pasta Cheese for garnishing - optional


Let's make Pasta:

1. Follow the boiling instructions of pasta as on the packaging. Once done, drain it and keep aside.

2. Heat Olive oil in a pan. Add cut red chilies and garlic. Sauté for a minute.

3. Add Pine nuts and garlic oil if you prefer.

4. Add boiled pasta to that. Mix well.


5. Sprinkle finely cut parsley, black pepper and sea salt. Mix well.

Your quick and easy pasta is ready to eat. Serve hot garnishing with cheese.

Search This Blog